Hello!
I'm back with just a quick one today, a card I made for the
Lawnscapings Challenge for this week.
Just quickly though, I want to thank everyone for your lovely comments about my
win (still smiling about that!), just to be chosen for the Lawnscaping prize was enough, but to have so many wonderful comments made here on my little piece of blog-land really was the icing on the cake. So thank you:)
Anyhow, onto the card!
Here is the Lawnscaping logo thinga-ma-jig
Distressing!!! Woohoo!!
I like to try to use
Lawn Fawn stamps only for the Lawnscaping challenges and whenever I've used distress inks before (with LF stamps), it's ended up looking really dreary and dull (NOT Lawn Fawn cuteness and whimsy!)
So I thought I'd go a different route and use the Distress Inks as watercolour paints. You've all seen me use this technique before and I"m sure many other people have used it on their blogs too. It's a really lovely way to colour in pretty soft tones--Distress Inks are
so versatile, you just have to love them even if that antique/brassy/old feeling that DI's often create aren't your cup of tea.
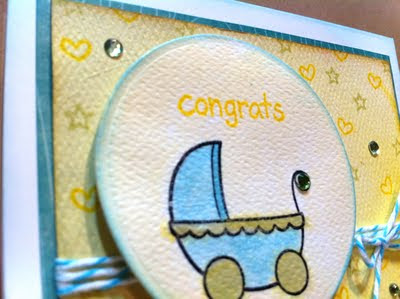
So here she is:
My sister is
very close to having her 2nd baby (woohoo!) so I've had baby-on-the-brain lately. I have made a girly version of this image too, but I'll share that another time (
that card is being difficult and wont come together for me lol).
Very easy to do: Stamp the image in Archival ink, 'stamp' the ink pad onto your craft mat (so there is a square of ink on the mat) and then spritz the ink with water. Then use a small paint brush to paint the image. Obviously, dependent on how much water you spray, the stronger or weaker the colour will be. For the blue (Tumbled Glass) and green (Shabby Shutters) of the baby carriage, I wanted darker, so I only sprayed 1-2 sprays on each square of ink. For the yellow background around the carriage (which is Mustard Seed), I sprayed it at least 5-6 times, so it's
very soft and pretty.
A closer image so you can see how the texture of the watercolour paper looks (
lovely).
The background (yellow) cardstock is also watercoloured paper (I used Mustard Seed and a little Shabby Shutters) but this time instead of painting it on, I just pressed a little ink onto my craft mat, sprayed it with water, then laid the cardstock onto the paint/water mix (on my craft mat) and pushed the cardstock around so the coloured water ('paint') would cover the whole piece.
I then edged that piece with a little Vintage Photo in the 'traditional' way (using a foam inking tool).
For the stars and hearts in the background, I just stamped them using the ink straight from the ink pads, so they would stand out against the more muted/washed out version that was on the background.
Lastly I just mounted all the bits and pieces together, added some gorgeous twine (that I just got in the mail *hurray for happy mail!*) and some gemstones and that was it!
I did make another card for the Distressing Challenge, but I'm not going to enter it, it's just not wow enough for my tastes, but here it is if you want a look:
Sorry for the TERRIBLE photo. I was exhausted at the time and I couldn't for the life of me get the lighting right. At least that twine looks so good it's almost edible! lol.
OK that's it for me today, I'll be back tomorrow with my card for the
Jay Gee's Nook challenge!
Take care and speak to you soon :)
*hugs*
Linda xx


