LINDA TRACE DESIGNS

crafty adventures of a makeup loving Japanophile!

.

.

Monday 29 November 2010

Whiff of Joy

Hi again dears!!

Today as I'm sure you all know is CYBER MONDAY!!! (Kinda sounds like robots are taking over the Earth dontcha think?! *wink). Anyhoo, apparently over there in the big ol' U.S of A, Cyber Monday is the day when everyone gets online and snags a bargain or two...or twenty  *lol* 
(actually I like the explanation that it's the day where everyone shops online instead of does their work lol!).

So lets get right to it shall we?! I'm going to show you some stamps that I personally am a HUGE fan of and I'm super-happy that I get to introduce them to you:

Whiff Of Joy

Whiff of Joy A Little Bit of Magic Might Help
 I just love this little elf girl image. Super super cute. I love that she would work perfectly for many times of year and many 'reasons' to send a card.  She'd also be ridiculously cute on a layout if you did one about a child having a (minor) illness like the measels or chicken pox.--or even a scratched knee.  My daughter has to have a bandaid put on EVERYTHING even if it's just a bumped finger lol!

Whiff of Joy Henry Celebrating Mouse Stamp
 Whiff of Joy has such an array of images that range from beautiful to cute. This one takes the cake *pardon the pun* for the cute ones! Just look at his huge ears!
Whiff of Joy Ice-beary Greetings
 Perfect for Christmas cards!! Even a winter themed layout--what a gorgeous little bear!
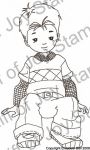
Whiff of Joy Oakley Sitting
This little Oakley Sitting image is one of my favorites.  Plain and simple. I love his shoes, his little pants, his cute messy hair. *love*
Whiff of Joy Fence Stamp
Using Inkadinkadoo or Copic Masking paper, you can have Oakley sitting on this fence (or in front of it).
All you have to do is stamp Oakley onto your cardstock/paper, then stamp him again onto masking paper, cut out the image (stay right on the line with your cutting, if you cut just outside the lines, you'll have a 'ghost-line' where your next stamped image wont quite sit properly).
Peel the backing off the masking paper stamped image, then 'stick' it onto the original image you stamped on your cardstock. Next, using your stamp-a-ma-jig (or just stamp freehand), stamp the Fence over the top of the masked image of Oakley.  When you peel up the masking paper, it will look like Oakley is sitting on top of or in front of (dependent on where you sit him) the fence!  (I'll do a tutorial on this in the next week or two if you like--let me know in the comments :))

Whiff of Joy Angel Delivering the Christmas Tree
 Just look how beautiful she is. Need I say more?
Whiff of Joy Baby Jesus Stamp
 Perfect for Christmas!!
Whiff of Joy Ben and Nora - New Year Couple Stamp
These are new to Whiff of Joy--and they are CUTE CUTE CUTE!!!  I can't wait to get my hands on this one :)
Whiff of Joy Cheers to You
 Cute for tags, place cards, backgrounds...the list goes on and on!!
Whiff of Joy Willow with Toddler
I just got this beautiful beautiful stamp in the mail today *claps hands* I canNOT wait to use it.  It's so beautiful. I'l be using it on a layout about my daughter. It will come in handy when a friend of mine has her baby (she's due soon!)


To see the rest of our Whiff of Joy Range go to their blog/store HERE

Well loves, that's all from me today!

Talk to you soon sweets!

Linda x

Saturday 27 November 2010

WINNERS!!

Hi!!!

Sorry it took me so long to announce the winners--what a week!!

And so without further ado, the winner is....*drum roll*

Random Generator.org AKA Charlotte-picks-a-name-from-the-hat
'CRAFTYHOMEMADE'---- congratulations!!!

You will receive your stamps in the mail VERY soon!

And because I'm feeling generous and Christmassy and all around grateful for all the support you guys poured out to me in TORRENTIAL amounts :), I picked a second winner who will receive some extra stamps from my personal stash :)


 Izzie's excited for...Mdoricheva!!!!! WOOHOO!!

**yes that is my hand holding the piece of paper, but she did pick it out. She just got too excited when the camera came out and she dropped it lol!

I truly wish I could have given you all a prize, it was so wonderful to have so many people join up to follow on this rambling crafty journey of mine.  Its so much more fulfilling to do this blogging business when there's someone on the other side actually talking back!! (otherwise it can be a bit like talking to a wall--not so much fun after a while!)

Anyhoo, please email me your postal addresses to cutiepiechan@gmail.com and I'll get them in the post for you asap!!!

Wishing you all a happy weekend (We went to see the Wiggles live show this morning for Isabella's 3rd birthday present--she nearly had a heartattack when she got to meet Murray-(the Red Wiggle) AND Santa :) It was great fun but SO loud...as expected)

Congrats again lovelies!! Make sure you're over at the a2z blog and store picking up some AMAZING bargains this Black Friday weekend!! (I'm heading back over there to finalise my wishlist now :))
Talk to you soon 

Linda x

Too cute a photo of this little goose not to include.


PS. Check out the awesome blog candy by Yenni on the left!

Thursday 25 November 2010

Happy Thanksgiving :)...this is a looooong post :)

Hello loves,


Today has been a busy day for me as it's Isabella's 3rd birthday today.  It's the first one we've spent at home too.  Her first birthday was in my (second) "home" town Osaka, Japan (awesome right?!), her 2nd was in Melbourne, Australia (her Daddy's hometown) and now her 3rd, here in Perth, where I grew up.
Izzie's 1st birthday in our hotel room in Osaka. lol. look at that little face
Izzie's 2nd birthday. She proceeded to have us sing songs from her favourite TV show and dance to them after this photo was taken, in the middle of a major meeting place/'square' in the city centre of Melbourne. heehee
Today we had a lovely day filled with giggles, mummy and Izzy snuggles (she was snuggly today :)) and lots and LOTS of Tinkerbell. She is currently obsessed with Tink and almost all her presents were Tinkabell related. She looks a lot like Tinkerbell herself actually, so it's appropriate.  She's currently sitting in her bed, in her room--supposed to be asleep, but I can hear her little voice going.  She's talking to her new doll. She's such a sweety.
lol. Munching on her "special Happy Birthday Omelette and toast"

So, inadvertantly, on a day when so many of you will be having pre-planned family days, we had one here too, a bit more impromtu and filled with a few dramas here and there but really truly lovely.  I tend to be quite secluded and quiet when left to my own devices, so it's been a long time since I've had a 'big' family dinner or anything, but I really enjoyed it tonight which was lovely.

While my family (my parents, sister and her family and my grandfather) all sat at the dinner table out on our back patio (it's summer here remember), I looked around at them all and through all the noisy chatter, Isabella singing, my nephew shouting to be heard, Charlotte whinging because she was tired, drinks being drunk, glasses clinking, plates being cleared of their pasta, I thought, what a perfect time to bring in a new tradition to the people who helped me build all my old ones.

And so we said Thanks.  Just as so many of you will today, I asked everyone to go around the table and say what they were thankful for.  Some were funny, some were sweet and evoked teary eyes, some were practical some not.  But it was lovely and something I want to do more often than just on this day.

Here's a little story to tell you how I got here to where I am today;

I took a trip to Japan with my whole family (8 of us) in November of 2008.  When we got home, I wanted to make an album that showed how wonderful it was for me to be back there. (For those of you who don't know, I lived in Japan for 18 months when I was 21 and I've never 'gotten over it'. I miss it every day and what it gave me.  I want to be back there--with my husband and daughters--every moment.)
So I visited a scrapbooking store.

The rest as they could say is history. I never looked back and slowly but surely began crafting more and more. I had to put it aside for a few months for various reasons; Isabella needed more attention, we didn't have space on our dining room table any more *wink*, we moved house etc etc.  Then we had to move in with my parents.  The space, I knew would be limited, but I insisted that I needed (not wanted) a space to craft.  I knew that being wiht my family, whilst lovely, would be difficult for me (being such a solitary person it's hard to always have people around!).  I needed a corner, a space, SOMEWHERE that I could craft, create, just sit and be.

I slowly began looking at blogs, reading them daily, watching youtube for tutorials etc etc. It's how I found many of the blogs I still read today. I haven't given any of them up, my list has grown in size tremendously. 
I still love the inspiration they provide and even if I dont have time or inclination to craft one night, I still find that I look at almost nothing but craft/cardmaking blogs and websites now.

I told my husband Matt that I had two 'dreams'. #1. I wanted to 'do this' for a living- I wanted crafting to be a job. #2. I wanted one of the big stamp companies to see my work and twitter about me.  I never thought either would really happen, but he encouraged me, never once saying anything about spending money on something like paper, glue or ink (rather than something more 'necessary'.) He watched youtube videos I put in front of him, of techniques on how to ink, embellish etc etc.  He even took the girls out on his own every Saturday so I could watch one of my favourite crafting ladies on her ustream show (Laura from Following the paper Trail--watch her, she's so amazing!).  He was (IS) the best.

Then one day I made an order with a2z Scrapbooking Supplies and fell into an easy chat-via-emails regarding my order (which was rapidly increasing in size) with Linda from a2z. (We bonded initially over the same name and then a joke I made about needing to feed my children over buying craft supplies lol!).

Not long after that I was SO excited to see that Hero Arts tweeted about a card I made.  Linda from a2z saw it and realised it was me and not long after, through various discussions, one night, while I 'talked' to her via my blackberry email (I was getting ready to take Charlotte a bottle of milk before I went to bed), Linda asked me to create and coordinate their blog and Design Team. 

It was around 1 am when she asked me and I was standing in our Laundry (Laundry ROOM for you USA residents :)) at the time the email came through to my phone and I literally started jumping up and down (In the dark). *laughs* 

Since then I've been so blessed to 'meet' all of you and I've had my wishes come true. AND SO. Today on this day of Thanks, I'd like to take this opportunity to tell you all (and remind myself) of what I'm so thankful for:

  • I'm thankful that despite not having a house of our own, we have a home. (Thanks mum and dad)
  • I'm thankful that I have the most wonderful husband, who-despite having NO artistic inclination, still gives me his opinions on my work and always tells me what I make is wonderful.  I'm thankful for him in every moment of every day, for everything that he is and does.

  • I'm thankful for my 2 beautiful girls.  Isabella is smart and challenging and tough--like me (but smarter :)); Charlotte is cheery and easy going and simply a delight to be around.

  • I'm thankful for my best friend Jodie-she is family to me and always will be-I'm so thankful to have someone as ball-bustingly-strong and loyal as you on my side my love :)

  • I'm thankful that on the days when I think "Gosh I have SO much work to do", that work is making cards, layouts, crafty things in general, and that I then get to share them with you.

  • I'm thankful--SO thankful for my friend Linda.  She is beyond words and has become so important to me.  She inspires and assures me when I need it, she makes me laugh and feel important and despite the fact that we've never met in person (YET), she is such a huge part of my every day, that I know we'll be friends forever.

  • I'm thankful for all of you bloggy readers and crafty people out there. For inspiring me, for writing lovely comments, for being friends and my support team over the last year since my blog was 'born'.

Lastly, I'm so thankful that I have SO much to be thankful for.

That's it from me, but I wanted to leave you with this quote:

"When asked if my cup is half full or half empty, my only response is that I am thankful I have a cup."              --Sam Lefkowitz

nice huh.

Happy and safe Thanksgiving to you all :)

Linda xx

Tuesday 23 November 2010

Machines and tools to make your crafting easier...

Hi there friends!


NB: This post was originally for Cyber Monday and the Thanksgiving week sales at the store, however, I thought a few of you might still like to see the info about the products.

Today we'll be focussing on the tools and machines that can help to make your crafting experience easier and lift a simple project to something really special.


Spellbinders Grand Calibur Cut and Emboss Machine

This machine is the cats pyjamas--SUCH a fantastic tool to have, it does practically everything for you!  The Grand Calibur cuts and embosses up to 8 1/8″ wide! It accommodates 8 1/2" x 11″ paper without needing to trim it down and can cut OR emboss multiple shapes in a single pass! It’s compatible with all Spellbinders die templates so you'll have no need to waste money buying replacement dies--PERFECT!


Scrap-Ma-Bob Clamp-On-Holder For Cup and Bag  


Now THIS is something I definitely need--I might even get one for my mum and she doesn't even craft! It's so perfect for every day 'non-craft' use, (not that I really understand that  term...I don't think I do anything non-craft *wink*!!)
The durable steal holder attaches to the edge of most flat surfaces and is designed to hold a drink and reusable trash bag (included). Holds 32 ounce drinks.

Stampendous Pail Quart 


The Stampendous Plastic Pail Quart is so cute and versatile!! It can be used for storage or decoration and can be purchased in various sizes to create a set. Each pail has a transparent side with a tin top and bottom. Use them as decorations that you can alter to fit any style or color-palette, or as great storage containers-- with the clear side you can easily see the contents and the snap on lid keeps items safely inside. Quart 4 X 5 inches.

Sizzix Big Shot Express

The same fabulous Big Shot machine we've all come to know and love for it's versatility, ease of use and outstanding results, but this has gone another step further into fabulousness--it's electric!! Say goodbye to the crank mechanism of the original and hello one-touch button die cutting and embossing!
The Big Shot accepts most dies-no matter the manufacturer, cuts paper, cardstock, fabric and much more, The Multi-Purpose Platform makes all Sizzix components compatible with the Big Shot and even works with other brand dies and embossing tool--not to mention has a fantastic easy-to-follow picture guide 'how to'. At this price, it's a steal!!


Zutter Bind-It-All Machine Version 2 


This is my personal favorite binding tool.  You can create one of a kind albums, calendars, journals and recipe books. Numbered register marks allow for punching accuracy for projects up to 12.5". Left and right hand application. Weighs under 3 lbs.  So easy to use and perfect for all projects! This price is simply outstanding!


Well, I think I'm sure to have overloaded you (and your shopping list *wink*) with that lot of goodies, so I'll leave you for now. Be sure to check back again tomorrow for even more great products and awesome prices!

Take care sweet friends!

Linda x

stuff,...

Hello hello!!!

This is just going to be a SUPER fast post today, 4 things to talk about...


1. Thank you all so much for your support of this blog. Having a sudden voice coming back from the audience (so to speak) makes it so much more fulfilling to be creating these things and posting them.  There truly are times when I've thought "Linda, NOONE is looking, just give up now!" but to have so many of you post comments and thoughtful encouragement over the last couple of weeks has been truly inspiring and it's really helped me find my mojo.

2.  The giveaway winner will be announced VERY soon. I'm having some trouble with the stupid blogger account. It's showing up as 49 followers, but I can only get 48 names...hmmmmm, If anyone has signed up to be a follower anonymously, please email me or leave a comment below this post so I can see if your name is the one missing.

3. I've decided I AM going to do the December Daily Christmas album that Ali Edwards is 'doing' on her blog. She's amazingly good at what she does. It's a lovely mixture of digital and 'real' crafting and I love the concept of really focussing on EVERY day of the Christmas season. I think I'll do 31 days though instead of 25, because my birthday is on the 29th December--and it just wouldn't be right to miss out on THAT would it?! lol

4. I've come up with and am in the middle of creating what will be (if it works out how it looks in my head) a truly GORGEOUS squeal worthy advent calendar...IF it works...which it had better! I'm employing Isabella's help with this one a bit, so I'm having to let go of my need to have colours coordinate and everything stay 'in the lines' because I really want to record her abilities etc at this stage in her life. It's her 3rd birthday on Thursday (Saturday we're going to see the Wiggles Live...she'll have a HEART attack lol) and she's SO smart and sooooooo on to me. Man, I can't get a thing past her lol. She keeps me on my toes.  Anyone who says being a stay at home mum is boring, is either without children or just has an easy kid...I however, am not one of those people :) I love it all (although it would be nice for her to acquiesce on ONE meal a day or ONE activity, but hey...I'm stubborn as a mule so I guess it's my come-uppance!!)

There really was something else...what was it?!?!?

OH! Go over to the a2z blog IMMEDIATELY (after finishing this sentence :)) and sign up to be a follower there, we are having an OUTSTANDING giveaway--it will help you to finish all your christmas cards in one go, or if you've already got some of the things we're giving away, they'd make perfect christmas gifts for someone special. 

All week we'll be having great specials, games, prizes etc etc to celebrate Black Friday, so get to it!! Get clicking over there!

Anyway, I'll have more pics etc of my current projects soon...here's one or two of Isabella and Charlotte at a recent family event.  It celebrates children who are turning either 3, 5 or 7 (it's a Japanese tradition).
showing the back of her gorgeous little kimono

lol despite their expressions, they were both having a lovely time lol!

lighting candles and saying  a prayer to ancestors. With her cousin  (my nephew) Daniel.

Now let it be said, I HATE things on baby's heads, ribbons, bows etc...or at least I did...Look at those cute 'little' thighs!! CUTE!!

talk to you soon lovelies and thanks again so much for the support

Linda xoxo

Saturday 20 November 2010

scattered bits and pieces

Hello!!

So this post is just a bit of random rambling.
  • WOWOWOW I'm so surprised by the enormous showing of support I've had for the giveaway!! I'm so excited ;)  I've added to the pot and it's currently sitting at about 6 stamp sets... I might even do an extra random giveaway too :)

First of all, I want to post THIS picture

it's the ENORMOUS giveaway over at the gorgeous Wee Memories blog (run by the fabulous Jenny :))
I want to live inside that pile of crafty goodness. (If you're nice to me, I might let you join me :)

ANYWAY, this is my little entry for the giveaway PICK ME PICK ME *waves hand in air*

  • I've been playing with some new product the last few days-- Some Metallic Rub-ons I got a little while back and Twinkling H2O's...I'm in LOOOOOOOOOOOOOOOOOVE!! I'll post the projects that they  turn out to be...
I'm TRYING to get around to starting my Ali Edwards December Daily album...but I just never get there...maybe when I'm finished my week-long Christmas Cards to Inspire posts over at the a2z blog. If you haven't checked it out, please do.  I'm showing a few new and a few not so new ways to use Distress Ink etc etc.

My kids have been fabulous this past week, but I'm so tired!! I hate being tired when you're generally having a good week--no fair!

We're in the middle of trying to get a home loan, I found the perfect house for us in Melbourne (we're moving there soon), so I'm praying that it will all work out.  We had originally thought we'd be heading over to the USA (HOW EXCITING WOULD THAT HAVE BEEN?!) but it's sooooooooo expensive and difficult to get VISA's etc etc, so maybe in a few years. It's still definitely in my plans.
So anyway, if you can all join me in praying that the banks play nicely with us and let us buy the house we want :) that would be great--any deity you believe in, I don't mind who :) we could use all the good luck we can get!

I'm VERY impatiently waiting for my latest order from a2z to arrive so I can start playing and show you my new creations.

I've had problems with my printer, so it had to be shipped off to the store to get fixed, bbut of COURSE, nothing went wrong with it while it was in the store, so we had to wait a week to find that out, then go pick it up GAH--THE ANNOYANCE!!

I MUST send you over to my friends new blog Simonetta Creations --she's only kinda new to craft and this blog is very new (and I"M the one who told her to get a blog going!! *proud*) but she's CUH-RAAAZY talented... I want to make layouts just like hers :) kisses to you girl xx

Anyway, that's about it for me. 

Talk to you all soon--don't forget the giveaway closes soon so get your friends to follow me!!

Lots of love

L xxx

Christmas cards to inspire Day 4: Distress Ink Swiping

Hi there,

Welcome to day four of my Christmas Cards to Inspire!!

Hopefully I got the look of the snowy night correct, here in Perth, we literally NEVER have snow.  I've seen snow a total of twice, once it was falling in the distant mountains when I was in Hiroshima, the other time it was on the ground, in Niseko (a small town in the North of Japan).  I was in heaven and can't wait to see it/be in snow again. Till then, my little snowy christmas card will have to do! *wink*

Here is today's card;


This card is SO easy and perfect for mass production;

First I took the Hero Arts Starry Night stamp and wiped Black Soot Distress Ink from left to right. I then stamped it onto white cardstock.  The 'wiping' created a look of a snowstorm/a windy snowy night around the trees.  *LOVE*

Next I rubbed a tiny bit of Mustard Seed Distress Ink over the largest star in the top right corner, to give it a glow.

Then I added some Diamond Stickles to the ground and stars (a tiny bit to the tree branches would work too, but I left mine bare).   I tied some red and white striped bakers twine around the image, tying it to a button.

Then I adhered the white stamped cardstock onto a slightly larger piece of black cardstock, to create a matte.  Then I adhere both layers onto a piece of white textured cardstock that I had cut to size and scored in the centre to make the card.

On the inside (not pictured), I stamped a Christmas sentiment with Versamark ink and embossed with Stampendous Red Transparent Tinsel Embossing Powder.

That's it!! Like I said, super easy and perfect for mass production!

Hope you like it!  Let me know what you thought :)

See you tomorrow with another card!

Take care lovelies 

Linda xx

Friday 19 November 2010

Christmas cards to inspire Day 3: Distress Resist

Hello again my dears!!

How are you all today? I'm DYING of heat exhaustion here in Perth today.  We're not even out of Spring yet and it was 36 degrees Centigrade here today. (That's 96.8 F) I was quite a bit like the Wicked Witch of the West this afternoon when I went out the front to get the mail...I'M MELTIIIIIIIIIIIIING *wink* (but without the socks and green skin haha!)

So anyhoo--welcome to Day three of my Christmas Card Inspiration Week!  Let's get straight to the card--I'm pretty happy with this one :).

The techniques I used on this one are Heat embossing and a technique called "Resist".


Here's how I did it:
  • I cut a piece of Bazzill Kraft Classic Cardstock down to 5 1/2" long by 3" high. 
  • Then I took my Versamark watermark inkpad and applied it to my Hero Arts Wreath of Leaves Stamp (I LOOOOOVE this image!)
  • I then stamped multiple times over the surface, going off the edge quite a bit on all of the images to give extra effect (I re-inked my stamp with Versamark each time).
  • I shook some Mustard colored embossing powder over the whole image and blew off the excess then I heat set it with my heat tool.
  • Taking my Ranger Inkssentials Blending tool, I then added a light layer of Peeled Paint Distress Ink and Walnut Stain Distress Ink to the cardstock, blending it in well.  
The embossing will resist the distress ink you put over the top. Just make sure you wipe over your embossed areas to remove any excess distress ink that might be there and to really make your embossing powder's color shine through. (this is the technique called "Resist). 
  • I lightly distressed the edges of the cardstock with my scissors (or you could use a Tim Holtz tonic distressing tool) and added some Black Soot Distress Ink to the edges, to sharpen up the colors.
  • Next I added some Red Hero Arts Ribbon, a little twine and a couple of buttons from my stash.
  • Then I stamped the 'Merry Christmas' sentiment from the Hero Arts Merry Christmas Trees Clear stamp set and in Versamark and used red embossing powder on that before heat setting it.
  • I attached my inked, embossed and 'ribboned' cardstock onto a folded card that I'd made out of kraft cardstock (which I cut to size and scored in half).
  • On the inside of the card, I used the 'Best wishes for the season' sentiment from the same Hero Arts Merry Christmas Trees Clear Stamp set in Walnut Stain Distress Ink.

I'm starting to really utilise the insides of my cards now. I love adding a little something extra wherever I can.

Anyhoo, that's it! Super easy and it would really be easy to make multiples of these! I'd just stamp the Wreath image all over a bigger piece of cardstock and emboss it all, then cut it down to size! 

One more quick note--You can do the first few steps in the opposite order; the distress inks first and then add the embossing over the top.  This will only work when you are using colored embossing powder, but if you're using clear powder (so that the color of the cardstock underneath will show through), you must do the embossing first, then go over with your distress inks second.
(Because if the embossing powder is clear--and on top of distress inking- the distress inks will show through and you wont see your embossed image, it will just blend in with the distress inks colors.)

**A tip!!  If you do go the other way around (Distress ink first, then emboss over top), make sure the Distress Inks are completely dry before stamping the 'Versamarked' image (and most importantly, the embossing powder). If it's not dry, when you pour the embossing powder on, it will stick to the entire cardfront, not just the image you've stamped with the Versamark--very annoying...trust me *wink*
Have fun with this! It's a favourite technique of mine!

Talk to you tomorrow!

Linda xx

Thursday 18 November 2010

Christmas cards to inspire Day 2


Hello!!

Welcome to day 2 of my Christmas Cards to Inspire week!

Yesterday I showed you the pretty effects if you use Distress Inks as Watercolor paints on standard Cardstock.
Today I want to show you the difference when you use watercolor paper, which has much more texture and thus, a better ability to tolerate more liquid.  It also leaves a pretty textured LOOK about the image, which I think is perfect for animals like...(you guessed it!! That cute little reindeer again) *wink*

Let's get straight to the card shall we?

This card has a really cute rustic feel about it, which I love. Sometimes I absolutely hate cards that--how can I put this the right way?!-- Take themselves too seriously.  Does that make sense?! I love cards that are pretty or cute or even whimsical--but no matter what, I love them to have a hand-made look, which this one does I think.

I used two techniques to create this one.

The first is using the watercolor paper with Distress Inks.  The second, is using my Acrylic Block to create that bluey-grey background.

To achieve this second technique (which was actually my first step), I dabbed some Tumbled Glass and Stormy Sky as well as Weathered Wood Distress Inks onto my acrylic block (Yes, I said ONTO the acrylic block---not the stamp).  Then I spritzed the acrylic block with a good 6 or 7 spritzes of water using my Ranger Mini Mister and then 'stamped' it onto Hero Arts Bright White Watercolor Paper .

I then cut my cardstock a 1/4" larger than the square of ink my acrylic block created (to leave a border of white). Then I edged my paper with Walnut Stain Distress Ink.

When the paper was dry, there was a really clear space in the color from the acrylic 'stamping', so I used that space to stamp my Hero Arts Fancy Reindeer in Black Stayzon Ink.
When the Reindeer image was dry, I used the same painting technique mentioned yesterday. I put the Frayed Burlap Distress Ink Pad upside down on my Ranger Inkssentials Craft Sheet to put the ink directly onto the craft mat, then spritzed with water.  Using a fine-tipped paintbrush, I painted the reindeer.  To give some shading, I waited for the ink to soak into the paper a little before putting a slight second 'coat' of ink down around the bottom of the reindeer's stomach and legs.
I used Fired Brick Distress Ink again for his scarf and nose (which I also popped a dot of Glossy Accents on).

Next I stamped the sentiment from Hero Arts Sprinkle Your Holidays with Black Stayz on Ink.

Then I adhered the watercolor paper 'layer' onto a  Hero Arts Cerulean (sky blue) notecard which I had trimmed down to size.  I edged the notecard in Walnut Stain Distress Ink after distressing the edges of the card.

Lastly I added some Hero Arts Small Accent Pearl (mine were white so I colored them with a Copic marker, but you can get some beautiful Light Blue ones that would be perfect)as well as some dots of Ranger Icicle Stickles to look like snowfall (and to add just a little bling *wink*).

I couldn't resisite popping a cute little blue and silver button from my stash in the corner, threading it with some red and white bakers twine for a final touch.

Hope you liked this one! I love the homey and textured look and feel of it!  I hope my explanation of the steps makes sense to you all, if you have any questions, PLEASE feel free to email me or leave a comment!


Please leave comments to let me know what you think!

See you tomorrow!

Linda xx

Wednesday 17 November 2010

Christmas Cards to Inspire :)

Hello again dear friends!

This week I've got some super cute (if I may say so myself! *teehee*) Christmas cards for you!

These all took me only a few minutes each to make with a few simple techniques that can create a lovely effect.

Each day this week I'll be sharing with you some ways to use products like Distress Inks and stamps --that you might not have thought to try.

The first two (today's and tomorrow's cards) I used water coloring techniques but Distress Inks instead of Watercolour Paint.  The difference between painting on watercolor paper versus 'normal' paper is pretty surprising.  Watercolor paper has so much more texture and can allow much darker colors to be 'reached' (because you can put more ink/paint down due to the absorbent nature of the paper.)
Using water with distress inks is an excellent way to achieve a great look with your favourite Distress Ink colors.  Because Distress Inks are alcohol based, they don't 'lose' their color (or intensity) when mixed with water. 

Onto the card: today's card features my favorite little reindeer:
 This card is SO simple to make it's almost criminal :) Perfect for making multiples.

Here's what I did:
Using Black Stayz On ink, I stamped the Hero Arts Small Fancy Reindeer.
Next I 'stamped' some Frayed Burlap Distress Ink on my Ranger Craft Mat and spritzed with water using my Ranger Mini-Mister.
Taking a fine 'tipped' paint brush, I dipped the brush into the ink (swirled it around to make sure it blended with the water on the mat) and began painting my Reindeer image.
No special technique for the painting is required. 
Repeated steps 2 and 3 with Fired Brick Distress ink to color his nose and scarf --choose whichever ink colors appeal to you. (REMEMBER TO WASH YOUR BRUSH OUT BETWEEN COLORS!)
Using my 3" scalloped circle punch, I cut out the painted image. (The Scalloped Circle Nestabilities Die would work just as well)
I gently inked the edges with Antique Linen Distress Ink and a Ranger Inkssentials Blending Tool.
I put a TINY dab of Glossy Accents on his eyes and Ranger Diamond Stickles on his nose for extra sparkle and interest :) 
(I nearly painted his hooves, but then remembered Rudolf is a boy *wink*--my next Reindeer project will have to be a girl :) Pink or Red Hooves would be too cute! Teehee)
Using a 3 1/4" circle punch (Martha Stewart Circle cutter or Nestabilities Die would work perfectly too), cut out red cardstock.
Adhere the reindeer scalloped circle die-cut to the red circular die cut cardstock, using dimensional adhesive.
Take white cardstock, cut to size (mine is 4 1/8" wide x 4 1/8" high) round the corners with a Corner Chomper and stamp the "Merry Christmas" sentiment from 'Hero Arts Wishes Come True' Clear stamp set in red (I used Worn Lipstick as it worked better with my red cardstock and didn't blend in too much with the scarf-which I wanted to be the focus) and then again in Forest Moss Distress Ink.
 ** Try doing this last step with a smaller acrylic block if you can and have fun with it. Twist and turn your stamp around in all different directions. Leave spaces for the second color. Don't forget to stamp half off the page too, as this really makes a fun and easy (not to mention HAND MADE) background paper! The less neat and linear you make this part, the better the end result.**
I also edged my paper just lightly with Forest Moss Distress Ink using my Ranger Inkssentials Foam Blender tool, just to help make it stand out against the backing card.

Finally, cut some red cardstock to your desired size, score in the centre.
Adhere the circular cardstock onto your 'background paper', adhere that onto the front of your card! Round your edges with a We are Memory Keepers Corner Chomper and you're done!


**Note, if you are going to cut out the image you're painting, then feel free to paint like a toddler-- messy and quickly.  *wink* Don't worry about getting paint outside the lines, you'll be cutting the image out anyway, so you wont see the 'mess'.  If you are going to use the image and some/all of the white space around it (like I did here), you need to be a bit more neat.  
One option is to heat emboss the image first (use clear embossing powder if you've stamped in black already, or black embossing powder if you're only using Versamark ink) The heat embossing will give you a 'border' as such. Because heat embossing creates a raised area where the embossing powder has set, the 'paint' will stay in the lines more--especially if you only use a little at a time.

Hope you enjoyed this cute little reindeer card and try something like this for your Christmas cards! It's fast and easy, perfect for making enough cards for everyone!

See you tomorrow!

Linda x

Saturday 13 November 2010

Giveaway!!

Hi everyone!! 

Just a quick post today--I have an exciting giveaway I'd like to share with you!!

My gorgeous friends at a2z have offered me TWO fantastic Hero Arts stamps to giveaway--thanks so much lovelies!!

Here they are:

CL459 Merry Christmas Trees

CG215 Wreath of leaves
These are two of my FAVOURITE Hero Arts Christmas stamps...

SO---all you have to do is become a follower for my blog! HOW EASY IS THAT?! If you're already a follower, then you'll already be counted in for the giveaway.

You have until Monday 22nd 9pm Perth time to get your name on the list!
**Perth, Western Australia is GMT +8--we are 13 hours ahead of Eastern Time Zone (currently)**

If I hit more than 30 in that time, I'll be sweetening the pot with some extra goodies--who knows HOW much fabulousness I can fit into the prize package?!

So go on!! Click the 'follow' button on the left, get your friends to do the same!

Good luck!

Linda xoxox

Wednesday 10 November 2010

Banner for a little girl's room

Hi there!!


So sorry for the long time without anything new on here in our little piece of bloggy paradise! My eldest daughter who is 3, has been...well, let's say "being a challenge" these past few weeks and leaving me with absolutely NO time to do any crafting let alone time to write something to accompany such crafting!  Please forgive the lapse in time :)

I wanted to make something for Isabella's (my 3 year old) room.  I wanted it to be a bit more personal for her and pretty it up a bit (it used to be my nephew's room so it's a bit boy-ey with the blue walls :))

Plus, I'm crazy-mad in love with banners.

This is what I've been up to:

Here is Isabella's new banner :) 

This is how I did it:

First I took some material that we call Calico but in the USA, Europe etc I'm not sure, it's what you'd use to put a Christmas pudding (which you probably don't have in the US either!) in or similar.  (It's like a linen but not stiff)

I cut the calico into triangles with my pinking shears--2 layers of material per triangle for double thickness.

Next I stamped the triangles using Hero Arts Dots Cling Stamp,  Hero Arts Flourish Background Stamp, Hero Arts Stripes Pattern Cling Stamp and Hero Arts Large Artsy Circles Stamp using Papertrey Ink Inkpads in Pure Poppy and Hawaaiin Shores. I left a border around the outside to highlight the stamping. Then I sewed the triangles together) the 2 layers of each triangle. But it would be easier to use Glue Glider Pro Fabric Bond (I've used mine all up!)

Next I took some Ranger Studio Sticky Back Canvas and using my Westminster/Sizzix Big Shot Cutting Machine cut it out with a Spellbinders Classic Scallop Oval Large Nestabilities.  (It needed a tiny bit of extra cutting with scissors but if you ran it through your diecutter with an extra piece of cardstock or similar to make a 'shim', it would cut through clean.)
Next I layed the die-cut ovals out on my Ranger Inkssentials Craft Sheet and using repositional adhesive in my Glue Glider Pro, I stuck some letters on top (These were just old cheap chipboard letters that I've had lying around forever. If  I did this project again, I'd use paper/cardstock as the chipboard sat up a bit high and created a ridge.)
Next I painted around the letters to make a mask/negative of the letter using some Kaisercraft paint I had in my stash.
Then I used Tim Holtz Vintage Photo and Walnut stain distress ink around the edges to give it my usual vintagey look.  (Plus the edging makes the colour and letters stand out more)
see how there's a tiny smudge around the outside of the letter? Using thinner cardstock would prevent this (instead of chipboard)
Next step was to peel the back of the canvas and adhere onto the triangles (I used alternating colours, blue letter canvas on pink banner triangle)

 I felt as though it needed something, so I used a very slim paint brush and painted a thin line around the outside of the stamped area on the triangles (still leaving a plain border).  I also used my We are Memory Keepers Crop-a-dile and set eyelets in the top to thread through string/ribbon.

Here is the finished banner (In two photos so you can see closer up.)


Hope you like it!! I"m really happy with how it came out :) Isabella loves it too "Where did you get that mummy?!" was what she shrieked lol.  She knows the first letter ('I') is for her name so she's happy haha. Beyond that, she just thinks it's pretty!!  That's ok with me though!

Stay tuned because in the next few days I'll be posting a tutorial on how to use the Imaginisce I-top!! (One of my favourite tools!!)

Talk to you soon lovelies!!

Linda