LINDA TRACE DESIGNS

crafty adventures of a makeup loving Japanophile!

.

.

Wednesday 29 February 2012

Final week of GD at Simon Says Stamp Challenge Blog.

Hello sweet friends,

I'm here with a bit of a bittersweet post today, it's my final week as Guest Designer over at the wonderful Simon Says Stamp Challenge Blog.  I've had such a lovely time being a part of the team, its honestly been a dream come true. I am still finding it hard to believe that they invited me!

I'd like to say a very big thank you to all the girls on the team, Lols for organising us all and being such sweet support when I emailed her, having a bit of an I'm-not-good-enough moment and of course, to Heidi and all the team at Simon Says Stamp for bringing us the amazing store that this blog is dedicated to!

So this week's challenge is ANYTHING GOES, highlighting the amazing company My Minds Eye.

thanks to our fantabulous sponsors
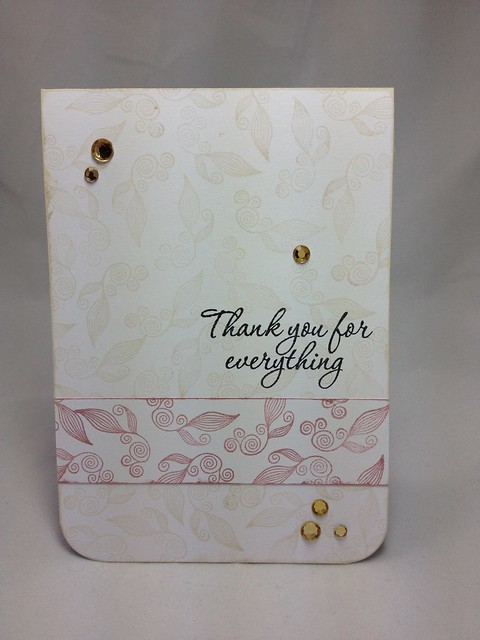

So here is my card:


You make my heart happy

There are lots of little details on this card. If my sewing machine was working I'd have done some stitching too, but unfortunately my poor baby is broken and in need of a servicing. 

Here's the how-to:

Take some white cardstock and cut to size (8" x 11"), scoring down the centre to make a 5.5" x 4" card.
Trim a piece of orange MME paper 3.5"wide by the length of the card and punch the side using a scallop border punch.
Cut a piece of the blue dotted MME paper slightly smaller than the orange paper and adhere them together, then adhere onto the card front.
Use a Tim Holtz Tab die to diecut a piece of the script MME paper, round of the corners with a corner chomper. 
Take a 2.25" x 4.75 " piece of white cardstock and round the edges with a corner chomper. 
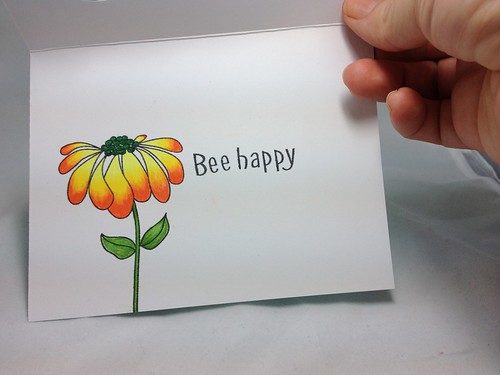
Use your Memento Markers to colour in the image on the Hero Arts Wild Flowers stamp (colour directly onto the rubber). 
**You don't need to be gentle or precise, nor do you need to worry about muddying the colours of the markers if you colour over a section that has already got ink on it.**
Huff (blow warm air) onto the stamp to re-moisten, then stamp onto the white cardstock. Press down firmly to make sure you get a good impression.
Add a little Antique Linen Distress Ink to the edges of the image, to give a nice antique distressed look. (this also helps to make the stamped image look 'right'.  With very crisp white cardstock behind it, it can look a little pale/poorly stamped. The distressed edging ties it all together nicely.)
Attach this stamped piece to the 'tabbed' piece, then adhere onto the main card. Add a Tim Holtz tiny paper clip to the top. 
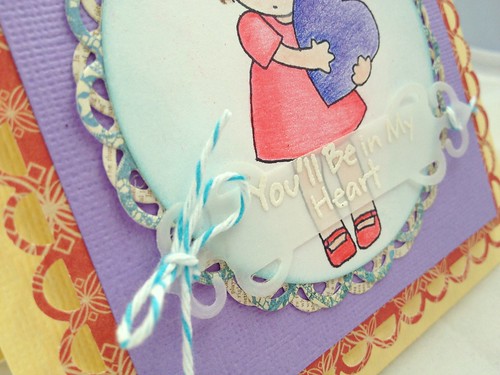
For the sentiment, take the Hero Arts Good Friends cling stamp. Using sticky tape (cellotape), cover the area around the sentiment you want to use. Carefully ink up the sentiment with the corner/edge of the ink pad. When you've got good ink coverage over the sentiment you want to use, remove the sticky tape from around it, which will remove any excess ink from the words you don't want to stamp. (I hope that makes sense!)
Stamp onto a strip of white cardstock, ' banner' cut the ends and adhere using dimensional adhesives!
Tie jute twine through three blue buttons and adhere onto the card. Finished!

It really looks like a lot, but it's not. trim some paper, adhere it all together, colour on a stamp, stamp, then adhere. Embellish :)

Well I hope you like it!

Be sure to join in the challenge for the chance to win


Just think--that could be $50 towards more My Minds Eye paper!! lol.

Now be sure to pop on over to the blog with me to see what the rest of the design team has made!

Thank you all so much for your lovely comments and support in my GD role :) I've loved every minute of it.

Take care and I'll speak to you soon!

*hugs*

Linda xxx

Here are the products I used to make this card, to purchase, just click the picture!


Monday 27 February 2012

Thank you for everything...

Hi Folks!

Thought I'd pop in before I head to bed, to share a card I made :)

I made this card after seeing an amazing card that my gorgeous friend Mary Dawn made HERE. (it was a little while ago but it's stuck in my head since I saw it) I love how she took a really simple stamp from the set, that most would overlook and turned it into an amazing card.

So here's the set:


Its a new Hero Arts one. Now, I've only had this for about 2 months, but I use it CONSTANTLY. However, when I was trying to think of how to recreate Mary Dawn's card, I saw that funny little swirl on the lower right hand side...see it there?!

This is the card:

Thank you for everything

I think this could be perfect as a sympathy card, a wedding card, a birthday card for someone older (or serious :)) with just a change of the sentiment you choose!

VERY simple to make. I took some white cardstock, cut it to the size I wanted for the card, scored it and corner rounded the bottom two corners.  Next I took my tiny stamp, inked it up with some Pigment ink in a champagne colour, then stamped it all over the card front (making sure to turn it this way and that, as well as going off the edge of the card).
Next I took a little strip of extra cardstock I had, and did the same thing, but with a dusty rose coloured ink. (I inked the edges of the strip & card base with the corresponding inks too)

I adhered the strip onto the card front, then added my sentiment. Finally I added a few gemstones to bring out the champagne colour in the ink.

Well I hope you like it! I'm planning on making a whole set of these with different colours.

Here are the products I used:


Thanks so much for joining me!

I'll be back VERY soon with my final *sob* card for the Simon Says Stamp challenge blog!

*hugs*

Linda xx

Friday 24 February 2012

Bee happy!

Hi!

Today I'm here to show you a card I made for the Hero Arts challenge this month.

I followed the sketch they gave as well as the theme of friendship :)

Bee happy chevron

Nice an easy and CUTE!

Here's a look at the inside:

Bee happy chevron_inside

First I took a piece of Pool Layering paper, cut it to size and scored it in half. Then I used the Hero Arts Zig Zag cling background stamp and heat embossed it with clear embossing powder to give a gorgeous tone on tone effect. Next I diecut the front panel using a Tim Holtz mini Ornamental die.
I stamped the large flower image from the Be Happy clear stamp set on the inside of the notecard, being careful to position it so that it would peek through the window in the front panel.
I also stamped the two little bees onto some scrap white cardstock.
I coloured in both the bees and the flower with Prismacolour pencils. Lastly I stamped the sentiment on the inside of the card and attached the bees to the front panel!

These little bees are one of my favourites of all time. They're so sweet looking :)

That's it!

Here are the tools and products I used to make the card:


I hope you like it!

I'll be back soon with more :)

Thanks so much for stopping by--take care!

*hugs*

Linda xx

Wednesday 22 February 2012

Simon Says Stamp Challenge Blog Guest Designer Week 4!!! Recipe

WOW how has it been almost a week since I last blogged?! It's been super busy around here!

So todays card is NOT the one I was going to be sharing with you, so I'll be bringing you another card very soon as I have an extra!

I'm very happy and honoured to be bringing you my fourth project for the Simon Says Stamp Challenge blog Guest Designer position.

Todays challenge over at the fantabulous Simon Says Stamp Challenge blog is to use 3 patterned papers!!

Our amazing sponsors as always are the wonderful Simon Says Stamp--be sure to pop over there as soon as you're finished looking here and do some shopping :)


On to the card!

You'll be in my heart

I thought I'd make something to 'match' the style of most of the design team. This layered type of card is really popular in England and Europe and its so sweet, but something I've never really tried before.

I wont go into details of how the card was made as I think it's pretty self explanatory.

Heres a closeup

You'll be in my heart_closeup

Now be sure to pop over to the main challenge blog with me and check out what the rest of the Design Team has made--Its sure to be amazing as always!

Dont forget to join us in the challenge this week for a chance to win a

Yes and please!!

Something very different for me today--I hope you like it!!

I'll be back VERY soon with another card (I've got plenty sitting on my desk just waiting to be shared!)

Talk to you soon--thanks so much for stopping by and all the sweet comments, it means so much to me!

*hugs*

Linda xx