As a quick word of 'warning' (too strong a word but you get what I mean), this project will also be up on the a2z blog, (I'm not being lazy, I just am so happy with the results that I have to share it here too :))
I wanted to make something for my 3 year old Isabella's room. I wanted it to be a bit more personal for her and pretty it up a bit (it used to be my nephew's room so it's a bit boy-ey with the blue walls :))
Plus, I'm crazy-mad in love with banners.
This is what I've been up to:
 | ||
| Here is Isabella's new banner :) |
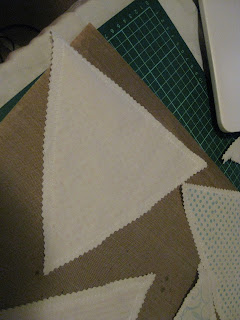
First I took some material that we call Calico but in the USA, Europe etc I'm not sure, it's what you'd use to put a Christmas pudding in or similar. (It's like a linen but not as stiff)
I cut the calico into triangles with my pinking shears--2 layers of material per triangle for double thickness.
Next I stamped the triangles using Hero Arts Dots, Fancy Flourishes, Stripes Cling stamp and Circles using Papertrey Ink Inkpads in Pure Poppy and Hawaaiin Shores. I left a border around the outside to highlight the stamping.
Next I took some Claudine Helmuth Sticky Back Canvas and cut it out with a Spellbinders Nestabilities Scalloped Ovals die. (It needed a tiny bit of extra cutting with scissors but if you ran it through your diecutter with an extra piece of cardstock or similar to make a 'shim', it would cut through clean.
Next I layed the die-cut ovals out on my Ranger Craft mat and using repositional adhesive, I stuck some letters on top (These were just old cheap chipboard letters that I've had lying around forever. If I did this project again, I'd use paper/cardstock as the chipboard sat up a bit high and created a ridge.)
Next I painted around the letters to make a mask/negative of the letter.
Then I used Tim Holtz Vintage Photo and Walnut stain distress ink around the edges to give it my usual vintagey look. (Plus the edging makes the colour and letters stand out more)
 |
| see how there's a tiny smudge around the outside of the letter? Using thinner cardstock would prevent this (instead of chipboard) |
I felt as though it needed something, so I used a very slim paint brush and painted a thin line around the outside of the stamped area on the triangles (still leaving a plain border). I also used my crop-a-dile and set eyelets in the top to thread through string/ribbon.
Here is the finished banner (In two photos so you can see closer up.)
Hope you like it!! I"m really happy with how it came out :) Isabella loves it too "Where did you get that mummy?!" was what she shrieked lol. She knows the first letter ('I') is for her name so she's happy haha. Beyond that, she just thinks it's pretty!! That's ok with me though!
Talk to you soon lovelies!!
Linda


3 comments:
How AWESOME, Linda!!!!!! Love the banners and this is so perfect for a princess's room! You are a great Mama!
Wow, it is gorgeous. It seems the crafting world is going "banner-crazy". Take a look at PTI site - they have an enormous banner project/release coming out.
I love the name too, Isabella - it is very pretty!
Wonderful banner! I think the fabric is called muslin in the US. Isn't it fun to make a child happy?!
Post a Comment