Hello again sweet friends!!
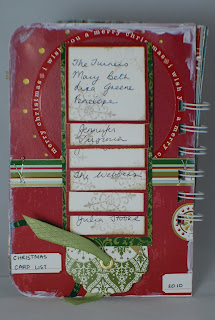
There are only a few weeks left until Christmas (8 actually...*gasp*!!) so it's time to get organised and today I have a special Christmas album I made using gorgeous Christmas paper collection from Little Yellow Bicycle to help with that organising!
The paper colors and patterns are very traditional and muted--truly lovely. I wanted to make something other than a traditional album to work with these very traditional papers, so I made a Christmas diary or to-do/reminder book for you to carry around with you during the Silly season. At home, here in Australia we have Christmas in the heat so I'm sure our to do list might be slightly different but I'm in charge of the decorations, so I ALWAYS have a list of what I need to buy or make and what I need to do.
(Sorry about the photos, I was having real trouble with my photo editing software today, so apologies for the dark background!!)
So here it is:
 | |
| here is the cover. . |
The closure is a Tim Holtz Clear Charm fragment that's been stamped with Stayz on and a Hero Arts stamp then used Alcohol Inks to color the back of the fragment to make it look like a bauble.
The cover paper was cut with the EK Success Scalloped border punch.
 |
| this is a calendar page I downloaded off the Internet and cut with Labels 4 Spellbinders Nestabilities die. |
 |
| Using the Hero Arts Ledger stamp I made a To Do list. |
 |
| Christmas Card list with a twist! I made a 'waterfall card' effect. |
 |
| excuse my hand but here you can see the pull down tab in action--it extends down about 3 inches and the small squares (with the writing on them) flip backwards--super cute! |
Here is a little section for some Christmas cards and stamps to be put in--I always find when I'm out and about, that I run into someone who's Christmas card I've forgotten to write. So I thought it would be helpful to have some extras stashed away in this diary so you could write a quick card on the spot if you need to.
This is a little section to keep old family recipes that you like to use each year. I just printed some out on various forms of paper and cardstock and aged them to help them look like they'd been passed down by family members or friends.
And finally here is a little hand-made notepad. I ALWAYS need a notepad! I simply printed out a 3 column word document with the lines on it, cut the pages to size and then using my crop-a-dile, cut holes and tied string to bind the pages together. Using Pumice Stone Distress ink and the Hero Arts Wishes Come True clear set (also used to make the bauble on the front cover closure), I stamped the little snowflake randomly over the pages to give a Christmassy feel. I backed the pages onto a heavy cardstock and threaded the backing cardstock behind a 'belt' made of cardstock, to keep it in the diary, but allow it to be removed when it runs out!
I also used a tonic perforating tool across the top of each page so you can tear them out as they're used.
 |
| Here's the back page--super simple and one-dimensional, which is the best thing for a back cover! |
I simply then bound the whole album and edged the pages with a tiny smear of white paint to give a distressed look that didn't darken the overall coloring.
As a final note, all these pages are using Tim Holtz Grungepaper, so that the album is slightly flexible but sturdy--important for anything that is going into your handbag. Everything used to make this album, apart from ink and the binding are from the Hero Arts Wishes Come True clear set and the Little Yellow Bicycle collection (which includes papers, rub-ons and stickers).
This really only took me a few hours to make in total, so you have plenty of time to order your papers now and get these made for yourself or even as a gift for a friend who likes to be organised (or maybe a friend who needs to be *wink*)
Linda xx


No comments:
Post a Comment
Thanks so much for taking the time to comment! I can't wait to read what you've said...